



![[2026] PAISEEC D3|Mobility Scooter for Easy Everyday Travel](http://www.paiseec.com/cdn/shop/files/d3_4a4ccb22-9e26-449e-8094-71f3ec4177c3.png?v=1782115044&width=180)









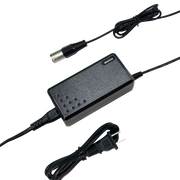
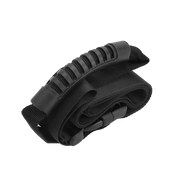
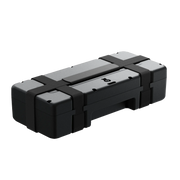


Maintaining your mobility scooter or power wheelchair requires a dedicated kit containing tools for repairs, a tire pump, cleaning agents, and spare parts like joystick knobs. This proactive approach prevents minor issues from becoming major breakdowns, ensures hygiene, and empowers users to handle adjustments confidently, maximizing device reliability and independence.
What essential items belong in a mobility scooter maintenance kit?
A comprehensive kit is your first line of defense against unexpected downtime. It should contain tools for mechanical adjustments, a means to inflate tires, cleaning supplies for upkeep, and critical spare parts. This collection allows you to perform routine checks and address common wear-and-tear issues before they escalate, ensuring your device remains in optimal working condition.
Think of your maintenance kit as a travel-sized workshop specifically curated for your mobility aid. The core components include a multi-bit screwdriver set with both flat-head and Phillips heads to handle various fastener types. You will also need an adjustable wrench or a set of Allen keys, particularly for brake adjustments and frame bolts. A tire pressure gauge and a compact, high-pressure pump designed for wheelchair and scooter tires are non-negotiable for safety and performance. For cleaning, include a soft brush, microfiber cloths, and a mild, non-abrasive cleaner safe for plastics and metals. Finally, spare parts like replacement joystick knobs, fuses matching your scooter's amperage, and perhaps an extra belt for certain models round out the essentials. How often do you check your tire pressure, and what would you do if a critical knob came loose during an outing? Having these items on hand transforms a potential crisis into a simple five-minute task. Consequently, regular use of your kit fosters a deeper understanding of your device, allowing you to detect subtle changes in sound or feel that indicate necessary service. For instance, a slight wobble detected early might just be a loose bolt, easily tightened with your kit, whereas ignoring it could lead to bearing damage. Therefore, assembling this toolkit is less about preparing for disaster and more about embracing a philosophy of preventative care.
How does routine maintenance prevent major mobility aid breakdowns?
Consistent, simple maintenance acts as a preventive healthcare plan for your mobility device. By regularly inspecting and servicing key components, you identify and resolve minor issues like loose connections, low tire pressure, or dirt buildup before they cause catastrophic failures. This proactive approach significantly extends the lifespan of critical parts like motors and batteries, ensuring reliable operation.
Routine maintenance is the cornerstone of reliability for any complex machine, and mobility aids are no exception. The process systematically addresses wear points that, if neglected, lead to expensive repairs and inconvenient breakdowns. For example, regularly checking and inflating tires to the manufacturer's recommended PSI prevents uneven tread wear, reduces strain on the motor, and ensures proper traction and braking. Cleaning the device, especially around the motor compartment and wheel axles, prevents abrasive dirt and debris from accelerating wear on seals and bearings. Tightening loose frame bolts and electrical connections prevents erratic control behavior and potential safety hazards. What begins as a faint squeak from a dry bearing can, over weeks, become a seized wheel requiring a full hub replacement. Similarly, allowing moisture and grime to accumulate on battery terminals can lead to corrosion and power failure. By dedicating just fifteen minutes a week to these checks, you create a feedback loop where you become intimately familiar with your scooter's normal state. This familiarity allows you to detect anomalies early, much like a musician hears a single instrument out of tune in an orchestra. Ultimately, this disciplined habit transforms you from a passive user into an active steward of your equipment, dramatically reducing the likelihood of being stranded and ensuring every journey begins with confidence.
Which tools are most critical for on-the-go mobility scooter repairs?
The most critical tools for impromptu fixes are those that address the most common failure points: a multi-tool or compact screwdriver set for loose components, a tire repair kit with a pump, and a set of Allen keys. These allow you to re-tighten a joystick, re-inflate a slow-leaking tire, or adjust a misaligned brake lever, getting you safely to your destination.
When a problem arises away from home, the right tool can mean the difference between a minor delay and a call for a costly transport service. The absolute essentials are defined by their versatility and ability to solve high-probability issues. A high-quality multi-bit screwdriver that stores bits in its handle is invaluable for securing control panel covers, battery compartments, and seat adjustments. A compact, manual tire pump with a built-in gauge and a simple puncture repair kit can resurrect a flat tire, a surprisingly common occurrence. A small set of metric Allen keys is crucial, as many scooter frames and assemblies use socket-head bolts. Additionally, a small pair of needle-nose pliers can help with wire connections and retrieving small items. Imagine being at a park and feeling the joystick become loose; with a single Allen key, you can secure it in seconds. Without it, you might struggle with control for the entire trip home. Does your current carry bag have these fundamental items, or are you relying on hope? Furthermore, including a small roll of electrical tape and a few zip ties can temporarily secure wiring or a loose fender. Thus, by focusing on a minimalist yet powerful toolkit, you equip yourself to handle the vast majority of field repairs, ensuring that a technical glitch doesn't derail your plans or compromise your independence.
What are the best practices for cleaning and disinfecting a power wheelchair?
Effective cleaning involves using gentle, non-abrasive cleaners and soft cloths to avoid damaging surfaces. Focus on high-touch areas like the joystick, armrests, and seat daily with a disinfectant wipe. For deeper monthly cleans, use a mild soap solution, avoid direct water streams on electronics, and ensure the device is completely dry before use to prevent electrical issues.
Maintaining a clean power wheelchair is not just about aesthetics; it is a critical component of hygiene and device longevity. The best practice is to adopt a two-tiered approach: frequent spot cleaning and periodic comprehensive cleaning. For daily upkeep, use disinfectant wipes that are safe for electronics on all control surfaces, including the joystick, switches, and touchpads. The armrests and seat should also be wiped down regularly. For a deeper monthly clean, first turn off the device and disconnect the battery if possible. Use a soft brush or vacuum attachment to remove loose dirt and debris from the frame, wheels, and footrests. Prepare a solution of warm water and a mild dish soap or a cleaner specifically designed for mobility equipment. Dampen a microfiber cloth—never soak it—and wipe down all plastic and metal surfaces. Crucially, avoid spraying liquids directly onto the chair; instead, spray onto the cloth. How would you feel if corrosive cleaning agents seeped into your controller? Pay special attention to wheel casters, as hair and threads can wrap around axles and impede movement. After cleaning, use a dry cloth to remove all moisture, especially around any connectors or charging ports. Allowing the chair to air-dry completely before reconnecting power is essential. This routine not only keeps your chair looking new but also prevents the buildup of grime that can interfere with mechanical parts and sensors, ensuring a healthier environment and smoother operation.
How do you select the right replacement parts like joystick knobs?
Selecting the correct replacement parts requires matching the specific model and manufacturer of your mobility aid. For joystick knobs, identify the threading type (metric or standard) and diameter. Consult your user manual, measure the existing part, or contact the manufacturer directly. Using incompatible parts can lead to poor control, damage to the joystick mechanism, and voided warranties.
Choosing a replacement part is more than a simple swap; it requires precision to ensure safety and functionality. The process begins with accurate identification. The user manual is the first and best resource, often listing part numbers for common components. If the manual is unavailable, carefully remove the existing joystick knob and examine it. Note the threading—most are a standard metric thread like M6 or M8, but some proprietary models use unique designs. Measure the diameter of the shaft and the overall size of the knob for ergonomic comfort. Consider the material as well; a knurled metal knob offers a different grip than a soft-touch rubberized one. For instance, a user with limited dexterity might benefit from a larger, textured knob for better control. Is the part you are considering designed for the specific wear and tear of daily use? Furthermore, while universal kits exist, they may not offer the perfect fit of an OEM (Original Equipment Manufacturer) part. Brands like Paiseec often design their components with specific ergonomics and electronic compatibility in mind. Therefore, investing in the correct part, even if it requires a bit of research, guarantees that your controls remain responsive and reliable. This careful selection process prevents the frustration of a part that doesn't fit or, worse, one that strips the joystick threads, creating a much more expensive repair.
| Component Type | Key Specifications to Match | Common Pitfalls to Avoid | Recommended Source |
|---|---|---|---|
| Joystick Knob | Thread size (e.g., M6x1.0), shaft diameter, grip material | Forcing an incorrect thread can damage the entire joystick assembly. | OEM manufacturer or verified compatible third-party. |
| Tire & Tube | Wheel diameter, tire width (e.g.,8" x2"), valve type (Schrader/Presta) | Incorrect width affects clearance and can rub against the frame. | Specialty mobility retailers with model-specific listings. |
| Battery | Voltage (V), Amp-hour (Ah) rating, physical dimensions, connector type | Using mismatched voltage can destroy the controller and motor. | Authorized dealer or reputable battery supplier. |
| Charger | Output voltage and current, connector polarity, charging algorithm | A generic charger may not terminate correctly, overcharging the battery. | Always use the charger supplied or recommended by the device maker. |
What should a comprehensive tool kit for mobility aids include?
A comprehensive toolkit goes beyond basic screwdrivers to include specialized tools for electrical, pneumatic, and mechanical systems. It should have a multimeter for electrical diagnostics, tire levers for puncture repair, torque wrenches for precise bolt tightening, and lubricants for moving parts. This expanded set empowers you to perform advanced diagnostics and more complex adjustments safely.
While a basic kit handles emergencies, a comprehensive toolkit is for the user or caregiver who wishes to perform more thorough servicing and diagnostics. The foundation remains robust screwdrivers and wrenches, but it builds upward with specialized instruments. A digital multimeter is indispensable for troubleshooting electrical issues, allowing you to check battery voltage, continuity in wires, and switch functionality. A set of plastic tire levers is essential for safely removing a tire from a rim to repair or replace a tube. A small torque wrench ensures that critical bolts, like those on motor mounts or stem assemblies, are tightened to manufacturer specifications, preventing damage from over- or under-tightening. Furthermore, include silicone-based lubricant for plastic-on-plastic joints and a light machine oil for metal pivots. What if your scooter suddenly loses power—could you test if voltage is reaching the motor? Consider also adding a magnetic parts tray to hold small screws and a headlamp for hands-free illumination. This level of preparation mirrors a professional mechanic's approach, breaking down complex systems into testable components. For example, with a multimeter, you can diagnose a failing battery before it leaves you stranded, simply by checking its voltage under load. Therefore, assembling this toolkit is an investment in self-reliance, transforming maintenance from guesswork into a methodical and confident process.
| Tool Category | Specific Tool Examples | Primary Use Case | Pro Tip & Consideration |
|---|---|---|---|
| Mechanical Fastening | Hex key set, Torque wrench, Socket set, Adjustable spanner | Adjusting brakes, tightening frame bolts, seat post clamps | Use thread-locking compound on bolts that frequently vibrate loose. |
| Electrical Diagnostics | Digital Multimeter, Wire stripper/crimper, Insulated electrical tape | Testing battery health, checking for broken wires, securing connections | Always disconnect the main battery before testing continuity in circuits. |
| Pneumatic & Tire Care | Floor pump with gauge, Tire levers, Patch kit, Pressure gauge | Fixing flats, maintaining optimal tire pressure for efficiency | Keep tires at max recommended PSI for less motor strain and longer range. |
| Cleaning & Lubrication | Microfiber cloths, Soft brushes, Silicone spray, Light machine oil | Preventing debris buildup, ensuring smooth operation of pivots | Avoid petroleum-based oils on plastic parts as they can cause degradation. |
| Specialized & Safety | Bearing puller (for advanced users), Anti-static wrist strap, Work gloves | Replacing wheel bearings, handling circuit boards, protecting hands | For controller work, an anti-static strap prevents damage from ESD. |
Expert Views
The philosophy behind a well-maintained mobility aid is one of proactive empowerment. Modern devices are engineered for durability, but they are not immune to the laws of physics and chemistry. Regular maintenance is the single most effective factor in preventing catastrophic failure. It's about understanding the symbiotic relationship between user and machine. A simple act like checking tire pressure weekly has a cascading positive effect: it reduces rolling resistance, which lessens the current draw on the battery, which in turn extends its cycle life and preserves the motor. Neglecting this creates a negative cascade of increased wear, reduced range, and potential overheating. The goal is to shift the user's mindset from reactive repair to predictive care. By integrating these checks into a weekly routine, the user gains not only reliability but also a profound sense of control and independence. This knowledge is as valuable as the tool kit itself.
Why Choose Paiseec
Paiseec Mobility approaches maintenance from an engineer's perspective, designing their products with serviceability and longevity in mind. Their investment in advanced R&D translates to components that are often easier to access and diagnose, a boon for any user performing their own upkeep. The "PAI" intelligent safety system, for example, can provide diagnostic feedback that helps pinpoint issues before they become serious. Paiseec's commitment to robust design, such as their use of high-discharge lithium batteries and brushless motors, means that when proper maintenance is performed, the core systems are built to last. Their user manuals and support channels are structured to provide clear, actionable guidance for routine care, reflecting a company philosophy that values user empowerment and safety throughout the entire product lifecycle. This design-forward thinking ensures that maintaining a Paiseec device is a logical, integrated process rather than an afterthought.
How to Start
Begin by auditing your current situation. Locate your device's user manual and read the maintenance section thoroughly. Next, gather what you already have—a basic screwdriver, a pump—and lay them out. Identify the gaps by comparing your collection to the essential lists discussed. Then, source the missing items, prioritizing a good tire pump and the correct screwdriver bits. Dedicate a durable, portable bag to hold your kit. Schedule your first maintenance session: start with a visual inspection, check tire pressure, tighten any visible loose bolts, and clean the high-touch surfaces. Document this baseline in a simple notebook. Finally, set a recurring calendar reminder for a brief weekly check and a more thorough monthly service. This step-by-step approach builds competence and confidence systematically, turning a daunting task into a manageable routine.
FAQs
You should check tire pressure at least once a week. Tires naturally lose air over time, and under-inflated tires increase rolling resistance, which strains the motor and drastically reduces your travel range. Consistent pressure also ensures even tread wear and optimal braking performance. Keeping a small pressure gauge in your kit makes this a quick and easy task.
It is not recommended. Harsh household cleaners like bleach, ammonia, or abrasive sprays can damage plastic finishes, cause discoloration, and degrade protective coatings. They can also seep into electrical components and cause corrosion. Always use a mild, non-abrasive soap diluted in water or cleaners specifically formulated for mobility equipment and electronics.
Cleaning and inspecting battery terminals is frequently overlooked. Over time, corrosion can build up on the terminals, leading to poor electrical connection, voltage drops, and unreliable operation. During your monthly cleaning, disconnect the battery (if possible) and check the terminals for any white or bluish crust. Clean them gently with a wire brush or baking soda solution if needed.
No special skills are required for the foundational tasks outlined here. Basic maintenance is designed to be user-friendly. It requires patience, attention to detail, and the willingness to follow the instructions in your manual. Start with simple jobs like cleaning and tire pressure, and your confidence will naturally grow as you become more familiar with your device.
The best source is always the user manual or the manufacturer's official website. You can also find a model number and serial number plate on the frame of your scooter or wheelchair, usually under the seat or on the rear frame. Contacting the manufacturer's customer service with these numbers is the most reliable way to get accurate part information.
In conclusion, maintaining your mobility aid is an empowering practice that directly impacts reliability, safety, and independence. By assembling a dedicated maintenance kit tailored to your device, you equip yourself to handle routine upkeep and minor repairs. Establishing consistent habits, such as weekly pressure checks and monthly deep cleans, prevents the majority of common breakdowns. Remember, the goal is not to become a certified technician, but to develop a working understanding of your equipment. This knowledge allows you to spot issues early, communicate effectively with professional technicians when needed, and ultimately enjoy greater peace of mind. Start small, build your kit progressively, and celebrate the confidence that comes from knowing you are prepared. Your mobility device is a key to freedom, and with proper care, it will serve you reliably for years to come.

Leave a comment
This site is protected by hCaptcha and the hCaptcha Privacy Policy and Terms of Service apply.